Using MacOS Shortcuts To Bulk Rename Photo Files as Part of a Photographer's Workflow
Intro - Moving away from Lightroom to Apple Photos
What is this about?
Well, I’d say I’m very much an amateur photographer and I have phases of months and months where I don’t touch my camera, and then I have a spirt where I like to take lots and lots of photos. And by taking photos, I don’t mean with my iPhone (because I constantly take photos with that); I mean with a “real” old school camera.
I have two actually, a Fuji X100F and a Fuji XPro 3. I love both of them.
Any way.. I used to use Lightroom classic, but I’m too cheap to keep paying for it. I’d like to use Apple Photos since it’s “free” and I think, for my purposes, it’s a good enough photo editor. (I know, Apple Photos doesn’t “speak” Fuji, but that’s ok - I usually don’t bother with Raw. I take RAW+JPEG, but I keep the Raw photos safe and sound on my NAS for a rainy day.)
And I’ll be using Apple Photo’s Referenced Photo feature and use a separate “local” Photo Library so my plethora of unprocessed photos won’t end up in iCloud (and to keep them logically separate from my main Photos Library). (and.. I don’t want Apple Photos to put all of them into a single library file - I like having actual folders and files on my filesystem!)
Take a look at this YouTube video for information about Referenced Photo Libraries and how they’re different from the usual stock Photo Library in Apple Photos.
File Naming
A key component of photography editing workflow is the naming conventions of the image files. Lightroom takes care of this for us but ASpple Photos doesn’t (since the default behavior is to put all the photos inside the Photo Library file, which we won’t be doing here).
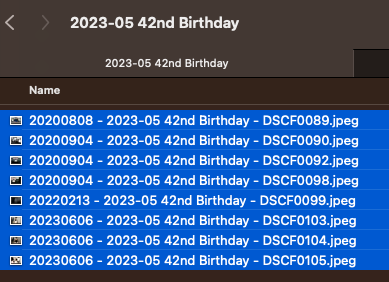
Any way, photo file naming convention includes the date in YYYYMMDD format at the front of the file (based on the date the photo was taken, for easy sorting purposes), followed by the name of the event, and finally, followed by the filename the camera creates. For events, I also like the year and month in the event name (which I use in the folder names and album names). Yes, I’m obsessed with date-based filing.
Example:
20230524 - 2023-05 42nd Birthday - DSCF0099.JPG
I was going to use Automator, but it seems now that Shortcuts has finally come to MacOS, it seems Apple is prefering people to use Shortcuts instead of Automator. I’ve never made a Shortcut before, so I figured this would be a good way to start learning.
Preparing
I created a folder in my Pictures folder for the event titled 2023-05 42nd Birthday and placed several photo files in the folder - but I chose them from random events so I can demonstrate the dates in the filenames after the Shortcut is run.
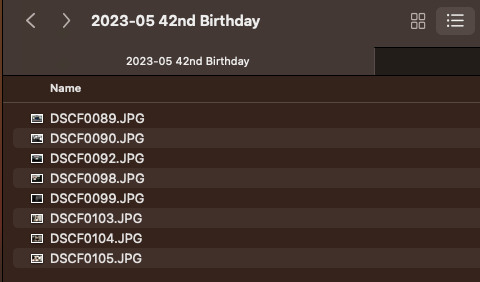
Making the Shortcut
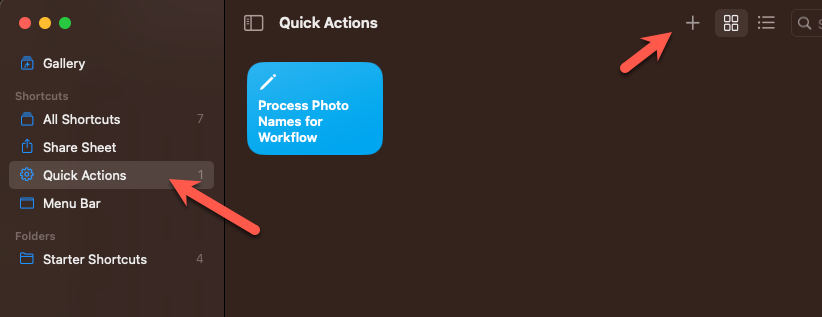
Now, we fire up Shortcuts and create a new one in the Quick Actions section.
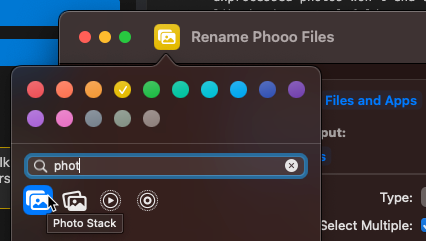
Naming your Shortcut
This is pretty simple. Give your Shortcut a name and an icon.
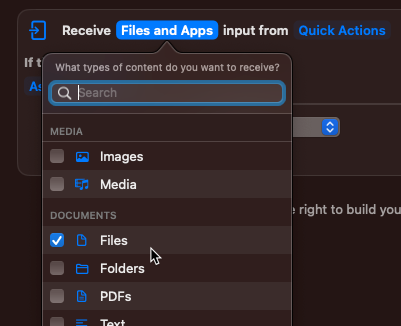
Selecting Files
The first section is what we configure what kind of files we’ll accept, and the constraints.
Make sure only Files is selected…
If there’s no input, then Ask for Files.
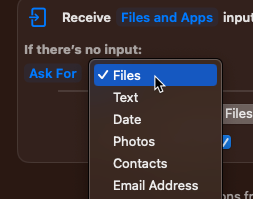
Then Show More and ensure Select Multiple is checked.
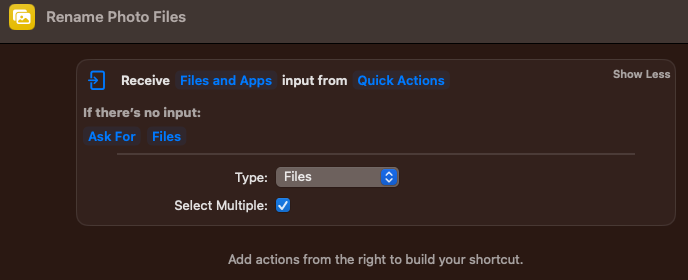
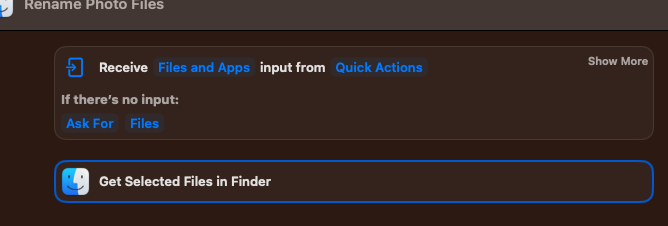
Then added the Finder Get Selected Files in Finder to activate those selected files in the Shortcut. Drage it below the Receive Files section…

Then you’ll see the sequence looking like this:
Getting Text Input for Event Name
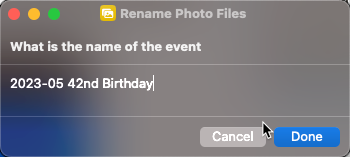
Now we need the user (you) to provide the name of the event. So we can add the Ask for Input control. Type in what you want in the prompt.

Add the Loop for renaming the files
Now we create a loop with the text input as input. Find the Repeat with Each control, and drag it below the text prompt we just added. make sure the Fileis selected after Repeat with each item in

Get the File’s Creation Date
We need to first get the creation date of the file. We do this within the loop. Find the Get Details of Files control and drag it within the Repeat loop.
We want the Creation Date. And that’s it.
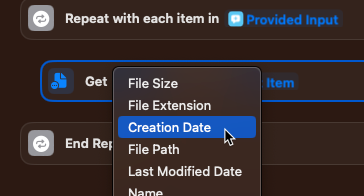
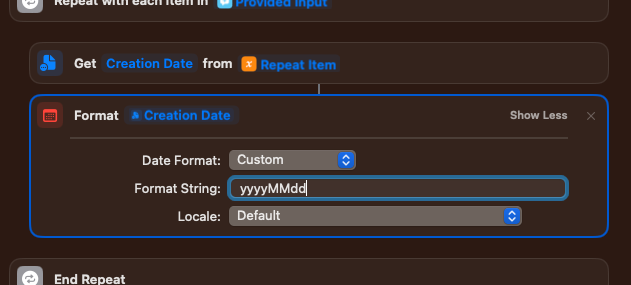
Then we want to format it. I like the yyyyMMdd format (YYYYMMDD). Find the Format Date control and drag it below the Get Details of Files control. Click on Show More and modify the format string to what you want.
Rename the File!
Finally, we want to rename the file. Find the Rename File control. We need to make some changes from the default. Here’s what it looks like after I drag it over.

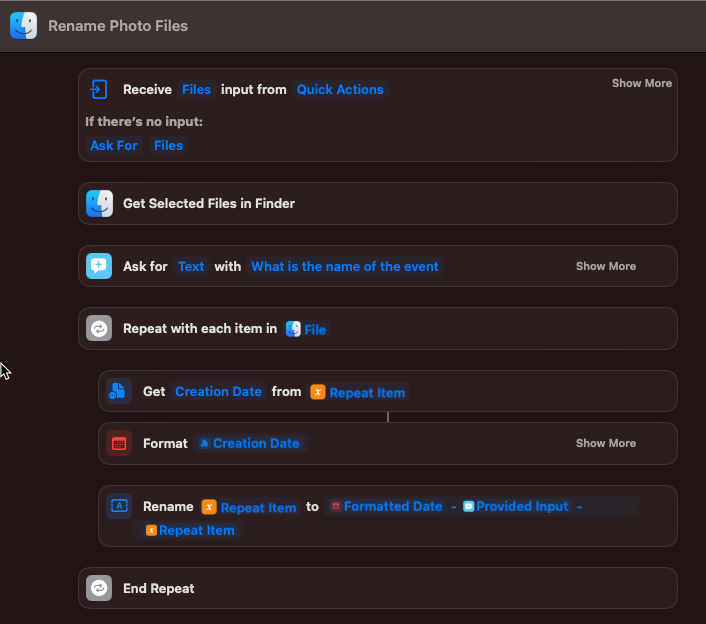
- Replace Name with “Formatted Date - Provided Input - Repeat Item”.
- Replace Formatted Datew with Repeat Item by right clicking on it, and selecting Repeat Item with the orange icon.
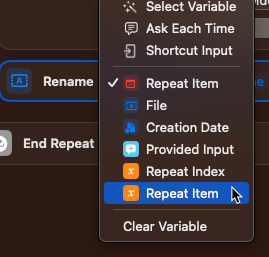
Now we will have the final file rename control that looks like this:

Final Settings - Enable as Quick Action
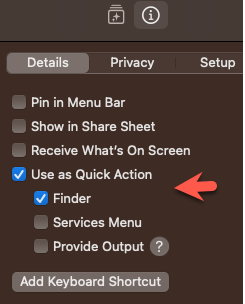
Last thing we need to do is enable it a as a Quick Action in Finder. Click the (i) tab on the right of the screen and make sure Quick Action and Finder are checked. You can of course use the other settings if you prefer.
You can now close the Shortcut window.
Using the Shortcut
Go back to Finder to the folder we created with the sample files. Select all of them, right click, go to Quick Actions and click on the Shortcut we just made.
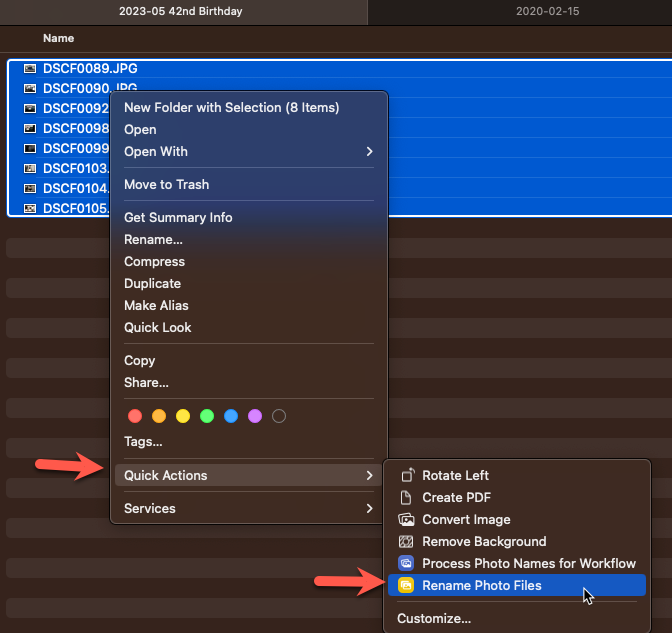
Click on it, and the event name prompt will show:
If this is the first time running it, you’ll need to give it permissions.

And we should now see all files renamed in the format we want!
The Final Shortcut
Here’s what the Shortcut looks like in its entirety.
It’s a little bit of a learning curve to navigate the UX, but once you get the hange of it, it’s pretty straight forward - at least ofr the simple task we needed to do here.
Thanks for reading!