Running FediFetcher from a Synology NAS
Intro
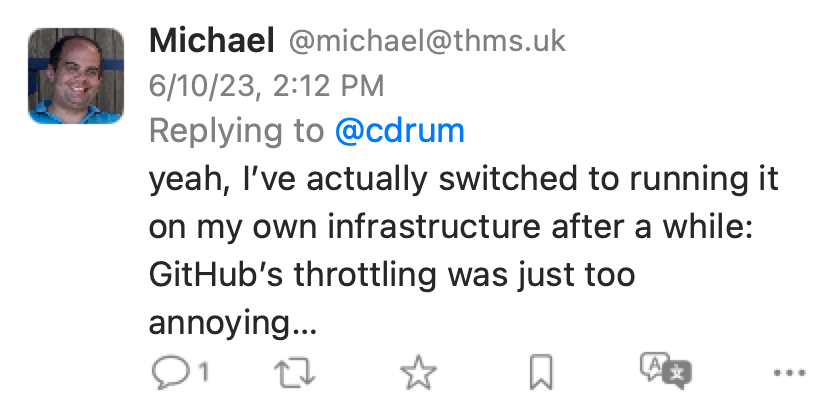
I wrote about getting my dedicated Mastodon instance/server up and running (thanks Masto.Host) the other day, and one key tool I am using is FediFetcher to pull posts from folks I follow, threads I interact with, etc. I started by relying on GitHub Actions, but I’ve found that GitHub is throttling my pipeline runs (which is understandable as I’m not paying for it!).
I exchanged some toots with the author of FediFetcher, and even he says he eventually migrated FediFetcher over to his infra.
I’ve got a Synology NAS sitting at home that is probably pretty underutilized. I know I can run docker containers (and normal shell scripts) on it so I figured I’d do that for a while and see.
In the README for FediFetcher, a Docker Container is available at ghcr.io/nanos/fedifetcher:latest. See https://github.com/nanos/FediFetcher/pkgs/container/fedifetcher.
I first thought I could use DSM’s GUI to install the image/container, but I was getting errors when trying to add the repo url. After a search online, I found this Stack Overflow thread that says aparently GitHub container repository isn’t supported in DSM? Huh?
The comment in question:
I eventuyally got the docker image downloaded, but I couldn’t figure out how to get the parameters passed into the docker container through the GUI. You can do it from the commandline, but I thought, if I was going to move everything to the terminal/cli, I might as well just run it as a normal script via cron.
So, that is what I decided to do.
Synology DSM Terminal
First requirement is you need to have terminal (ssh) access enabled on your NAS. You can see this article to get that turned on.
I do not use the root/admin user, ever.
Create a SSH public key if you don’t have one already and add it to your GitHub Account
| |
Add the above string into your SSH Keys in GitHub
Clone the FediFetcher Repository and Configure
I created a folder “Mastodon” in my user’s folder to keep things together as I plan to do more mastodon stuff on the Synology.
| |
Then clone: git clone git@github.com:nanos/FediFetcher.git
Now in order to install the requirements, I first needed pip. This worked for me: python -m ensurepip --upgrade
Make sure it’s in your PATH, I did this: echo 'export PATH="$HOME/.local/bin:$PATH"' >> ~/.profile and logged out and back in.
Now, I can install the requirements:
| |
I created a handy shell script to run this python script with my parameters. We’ll use this later in the crons. I named the file fedifetcher-cron.sh and put it outside of the FediFetcher folder in case I do any github pulls - I don’t want it to be overwritted/destroyed. In this script, I run python find_posts.py with the parameters above. Here’s what the script looks like:
| |
Note I added cd ~/Mastodon/FediFetcher at the beginning so the artifacts folder could be found.
Manual Runs
Running it, do note that the initial load will take quite some time!
| |
It didn’t take as long as I thought since I used to run the script via a GitHub Action, so maybe not as muc catch up to do? 🤷♂️
I proceeded to run a few times manually. 2nd run lasted about 45 minutes. Third time about 21 minutes.
Configure the CRON (via Task Scheduler)
The example shell script suggests running it every 10 minutes, so that is what I’ll do. I decided to add the cron to the user’s account, as opposed to in the /etc/crontab since it doesn’t need to be run as root.
I found the command crontab wasn’t avaialble to my user through the terminal. Perhaps it’s not installed or restricted. I’m to lazy to investigate, frankly. I decided to use the Synology’s GUI “Task Scheduler” instead (as it’s effectively cron anyway!).
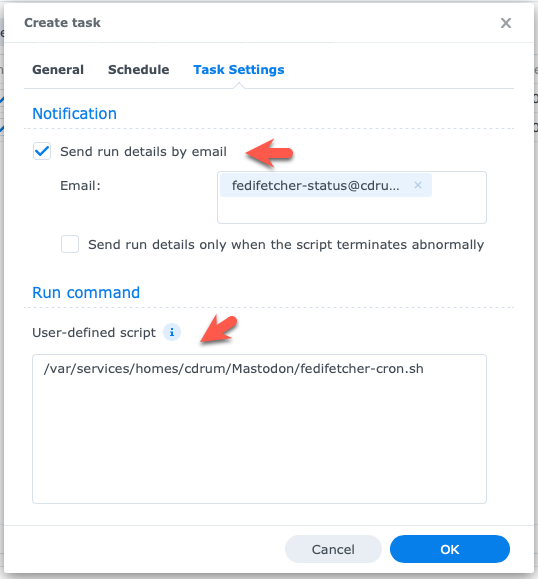
First thing to do is note down the full path of the script. In my case it is: /var/services/homes/cdrum/Mastodon/fedifetcher-cron.sh
From the Synology DSM interface, find Control Panel, and then Task Scheduler.
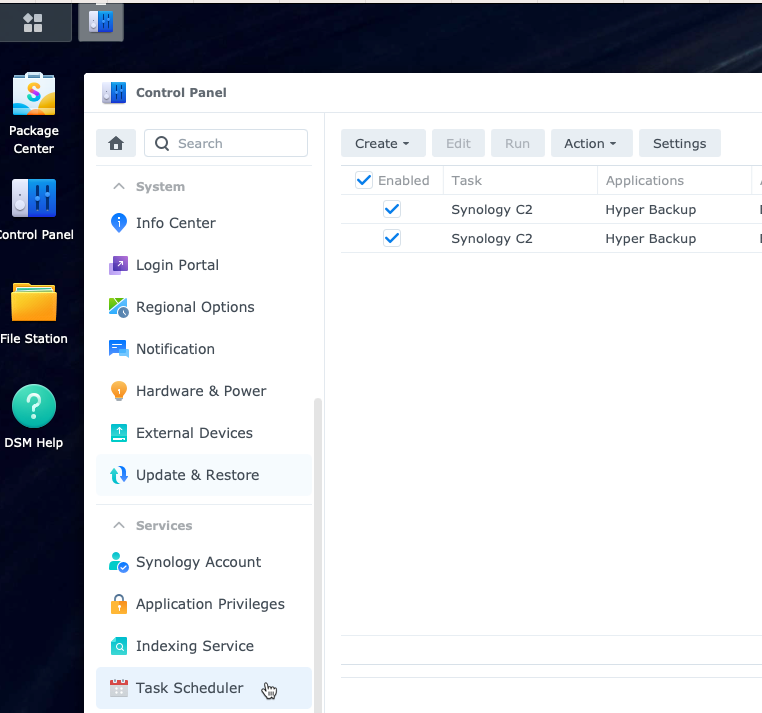
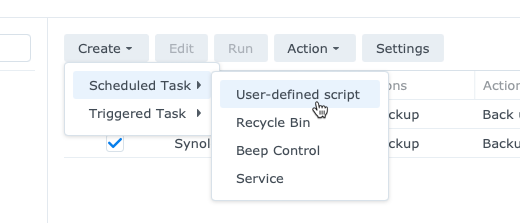
From Task Scheduler, I selected Create, then Scheduled Task then User-defined script.
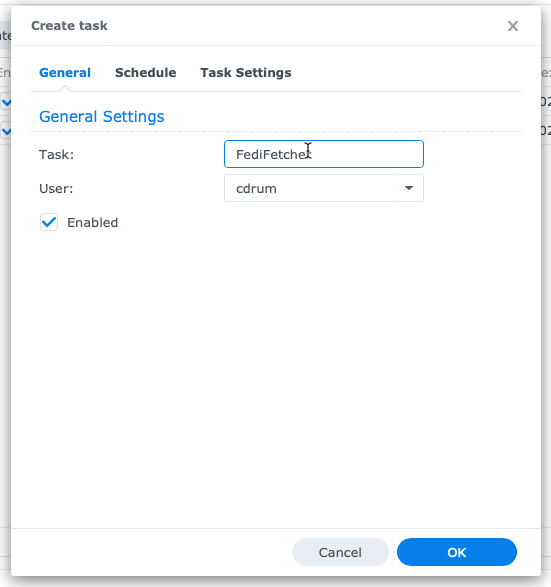
First screen, name it.
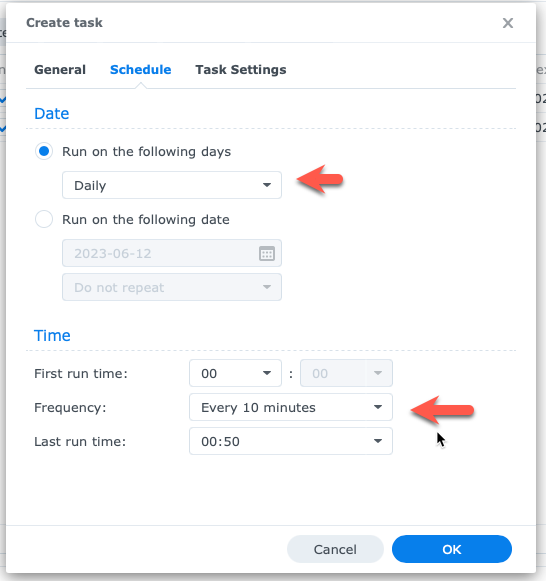
Then in Schedule, specify a schedule. I chose to run it every 10 minutes as that’s the recommendation in the example script. The documentation states there’s a lock file to ensure the script isn’t run more than once in parallel in case the script takes longer than 10 minutes to run, which it likely will from time to time.
Lastly, in Task Settings, I chose to have it email me after each run (for the short term) so I know it’s running. I’ll disable this feature going forward, or at least send me the email when there’s an error.
In the User-defined script, this is where we put in the full path to the script we want to be run.
And that’s it! Click OK, and wait to see if it runs!
Closing thoughts
I think the script is great as I am not super keen on adding relays. But I will not rule out relays completely. I’ll want to see how this goes over time. One issue with not using relays is my own toots won’t federate to servers where local users don’t follow me.. So that’s a concern that’s in the back of my mind. But for the time being, this is a good solution for populating relevant threads to me.
I’ll report back!
