Installing Bookwyrm on Ubuntu 22.04 LTS Server on a Synology NAS VM (Virtual Machine Manager)
Intro
I keep telling myself I need to read more. I have a kindle with a long backlog of books I have yet to read. But like any serial procrastinator, I need the right tools to do something. And with my recent foray into the decentralized fediverse, I figured a Bookwyrm account would be good to have! But… why create an account on bookwyrm.social when I can run my own instance?!
“You must be mad!” you may be thinking. Perhaps so. (and yes, this too me too much time to set up (troubleshooting the right settings for the tunnel), I could have made a serious dent in a book!)
In a previous blog post, I started to utilize my Synology NAS for some of my Fediverse experiments and services. Up to now, these have been focused completely on Mastodon.
I figured that I should be able to run a Bookwyrm server on the NAS. Some challenges I had to face:
- My Telco that provides my fiber access are a bunch of clowns 🤡 and they disabled the port forwarding functionality on the router they provided. And I don’t really want to buy a new router.
- I don’t want to run Bookwyrm as a service on the main installation of the Synology NAS. I don’t want there to be conflicts, nor do I want to expose my NAS to potential bad actors. So some sort of virtualized solution is needed.
Lucky for me, the solutions are within reach:
- Synology offers VM capabilities in their Virtual Machine Manager app. You can easily run Linux VMs (and other OSs) that are nicely segregated from the rest of the Synology DMS OS.
- Cloudflare Tunnels are free and will get around the port forwarding issue! An added bonus, we don’t need to mess around with Let’s Encrypt certificates either!
For the actual Bookwyrm installation and configuration, I followed the official instructions at this page mostly to the letter, but in this post, I will explain where I deviated, especially when setting up Cloudflare Tunnels.
Note: At the time of this writing, Bookwrym is at version v0.6.2.
Installing Ubuntu on a VPM
For some background reading, check out Lester Chan’s write up on getting Ubuntu Server up and running on the Synology DSM. Note, the screenshots are for an earlier version of Synology DSM - I’m on version 7.
You can, of course, run other Linux distros of your choice, but I personally am most comfortable with Debian/Ubuntu and decided to to install the server version of Ubuntu 22.04 LTS (we don’t need any of the Gnome GUI stuff for this). I downloaded it directly onto the Synology from this url: https://ubuntu.com/download/server.
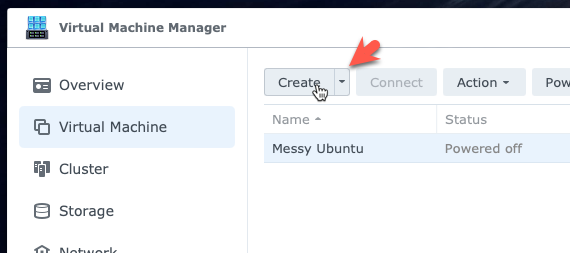
Open Virtual Machine Manager and click Create.
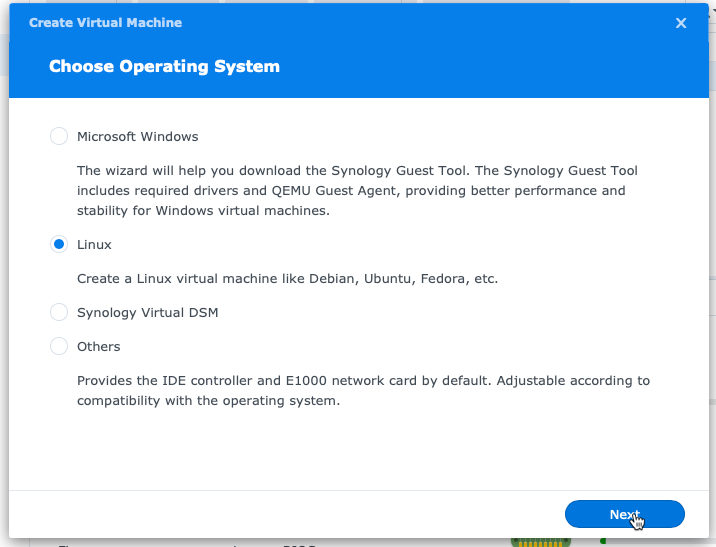
Select Linux.
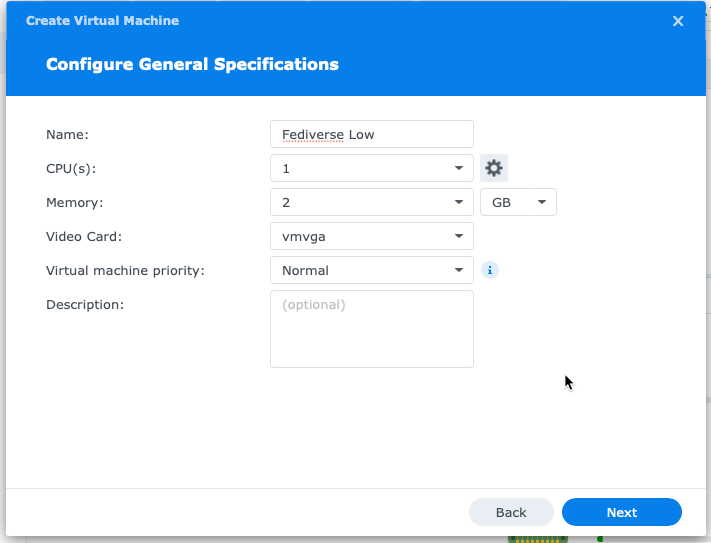
Configure the size of the VM - I chose 2 CPU and 2GB of memory (yes, the screenshot below shows 1 CPU). I’ll see how this performs but I may need to increase this in the future. But for Bookwyrm? Should be ok, no? 🤞
Also, I had to switch the Video Card from vmvga to vga, otherwise it wouldn’t boot. Not sure why! (So in the screenshot below, it’s not the setting I ended up using. YMMV…)
For Storage, I am giving it 200 GB, should be plenty. (Probably overkill, really… But if I end up hosting other services in this VM, It will be useful having extra storage).

Select Default Networking.
Then, in Other settings, select the boot up ISO that we downloaded.
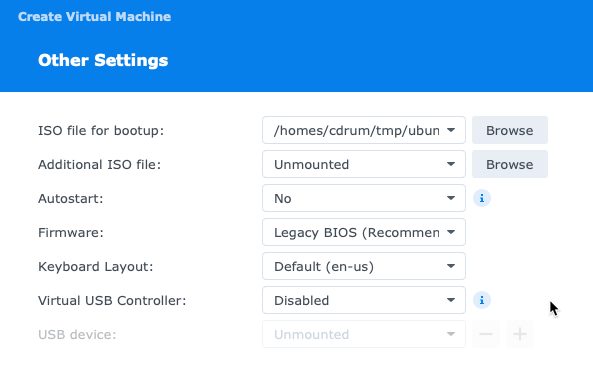
Then, assign power management permissions to your synology account. Save. Now, power it up. It should boot into the ISO. It may take a while!
Now, from the Virtual Machine Manager, click Connect to open a terminal (in a browser tab - we’ll sort out SSH later) to the VM. Select Try or Install Ubuntu.
If you get to the screen that looks like the below screenshot, you’re in good shape. Go through the process of installing Ubuntu, I won’t cover the details here.
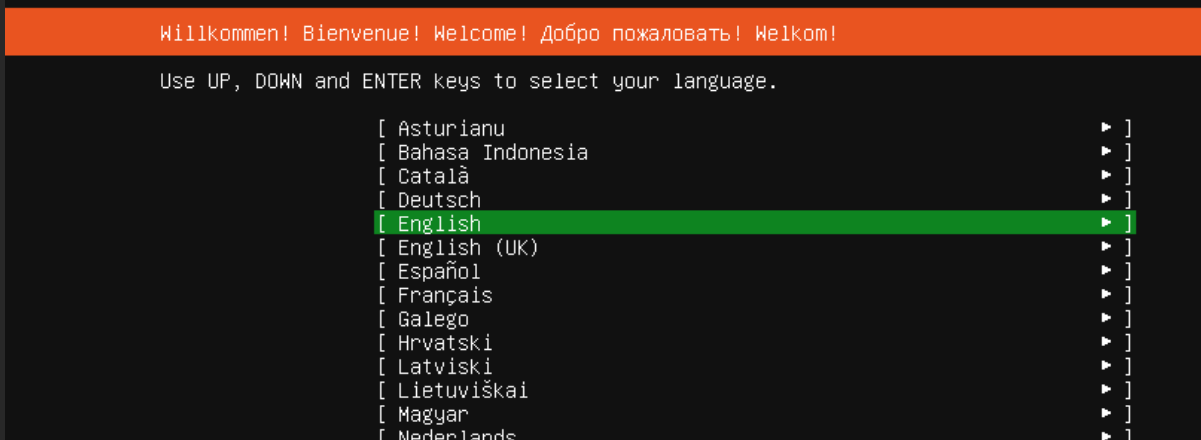
Also, you may want to consider installing the minimized version since we’re on a small virtual machine. No sense installing stuff we don’t need.

Grab a coffee ☕️. It will take a while.
Once it’s done, it may be a good idea to take a snapshot of the VM’s state, in case something goes wrong later, you won’t have to go through the installation process again!
Preparing for setting up Bookwyrm
We need to do a few things first, such as install a bunch of packages. Remember, we chose the minimal installation of Ubuntu Server, so not much bloat was installed. Here are the packages (and other command line stuff I had to do) I had to explicitly install:
| |
Then, clone Bookwyrm in your path of choice. (See https://docs.joinbookwyrm.com/install-prod.html), specifically:
| |
Stop there, let’s get our tunnels going first.
Configure Cloudflare Tunnels
Cloudflare Tunnels is a great free service from Cloudflare that allows you to create a secure tunnel into a machine/instance/VM deep within a network to allow remote access that otherwise wouldn’t be allowed. mWe’ll be using this for enabling SSH access to the VM, as well as HTTP/HTTPS access for the Bookwyrm service.
Setting up a tunnel is pretty straight forward and I’ll only touch on some specifics that I think is important to cover.
There are two ways (that I know of) for setting up a tunnel. The first is via the CLI and doesn’t require a Cloudflare account at all. The other does require a Cloudflare account as it utilizes the web console for set up and configuration. I opted for this method as I couldn’t get the SSH tunnel working using the first method. It certainly could have been user error!
Also important to note is for you to use a custom domain for the tunnel, as we’ll be doing, you need Cloudflare to host your domains DNS. Also free.
Some background reading:
- Instructions from https://pkg.cloudflare.com/index.html.
- Blog post that focuses on using the CLI to set up a simple tunnel: (Thanks@michael@mstdn.thms.uk): https://blog.thms.uk/2023/05/use-cloudflare-tunnel-to-share-local-development-site
- An article explaining how to get SSH working on the client and configuring the tunnel via the CLI: https://orth.uk/ssh-over-cloudflare/
- Another blog post, focused on SSH access, also via the CLI: https://danishshakeel.me/creating-an-ssh-tunnel-using-cloudflare-argo-and-access/
- Running the Cloudflare Tunnel within a Docker container: https://keestalkstech.com/2023/01/expose-docker-compose-app-with-a-secure-cloudflare-tunnel/
Install and Configure the Cloudflared Tunnel for Web Access to Bookwyrm
First we need to install the cloudflared application. Luckily, there’s a prebuilt binary for Ubuntu, we just need to add Cloudflare’s repo to our system.
| |
Now, remember, I chose to go the web console route for setting up and configuring my tunnels. I’ll assume you have an account already and that you have your domain configured to use Cloudflare’s DNS.
From the Cloudflare web console. access Cloudflare Tunnel from the your domain’s control panel in Cloudflare.
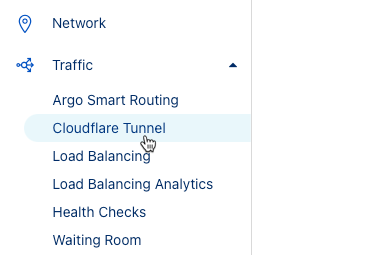
Then Launch Zero Trust Dashboard. I had to put in my credit card but it’s free for a small team (up to 50 users) so should be fine.
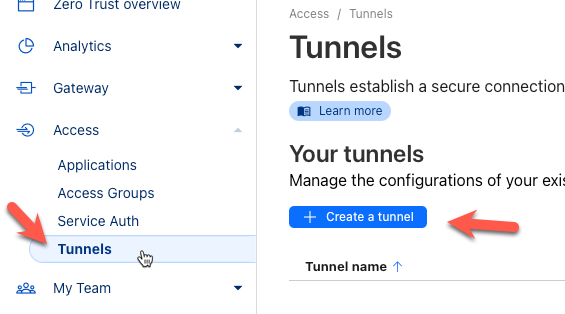
Find Tunnels under Access then click Create a tunnel.
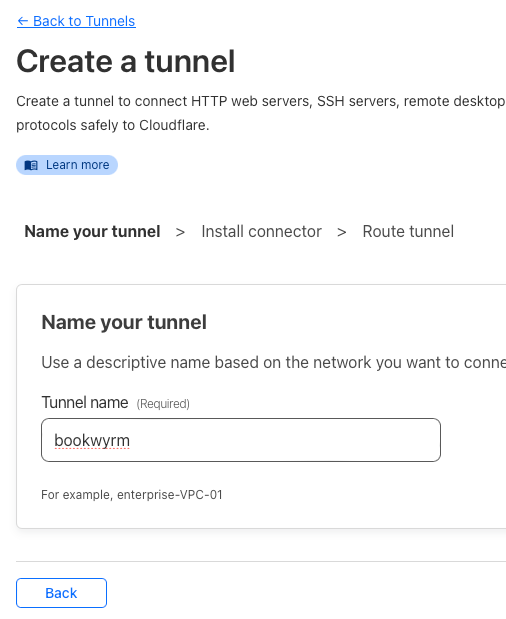
Give the tunnel a name - I called it “bookwyrm”.
Install the connector by copying the command and pasting it into your terminal CLI.
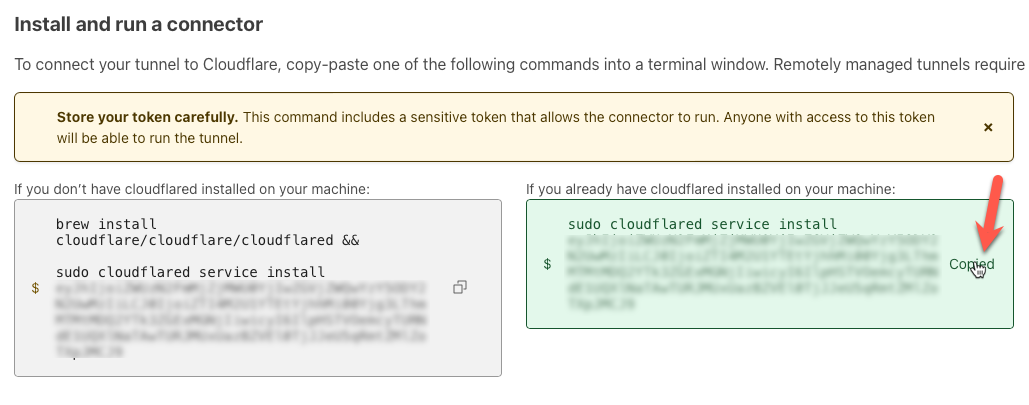 (save the token for later)
Make sure the connector shows up at the bottom of the page (and shows “connected”) before clicking Next.

Next it will take you tot he public hostname configuration. This is where you add the HTTP service. The beautiful thing about Cloudfare Tunnels is it will handle the SSL stuff for us. So all we have to do here is add a single service for HTTP. The Service URL should be nginx:80 - we’ll address that later. Then click Save tunnel.

You should now have single public hostname service that look something like this:

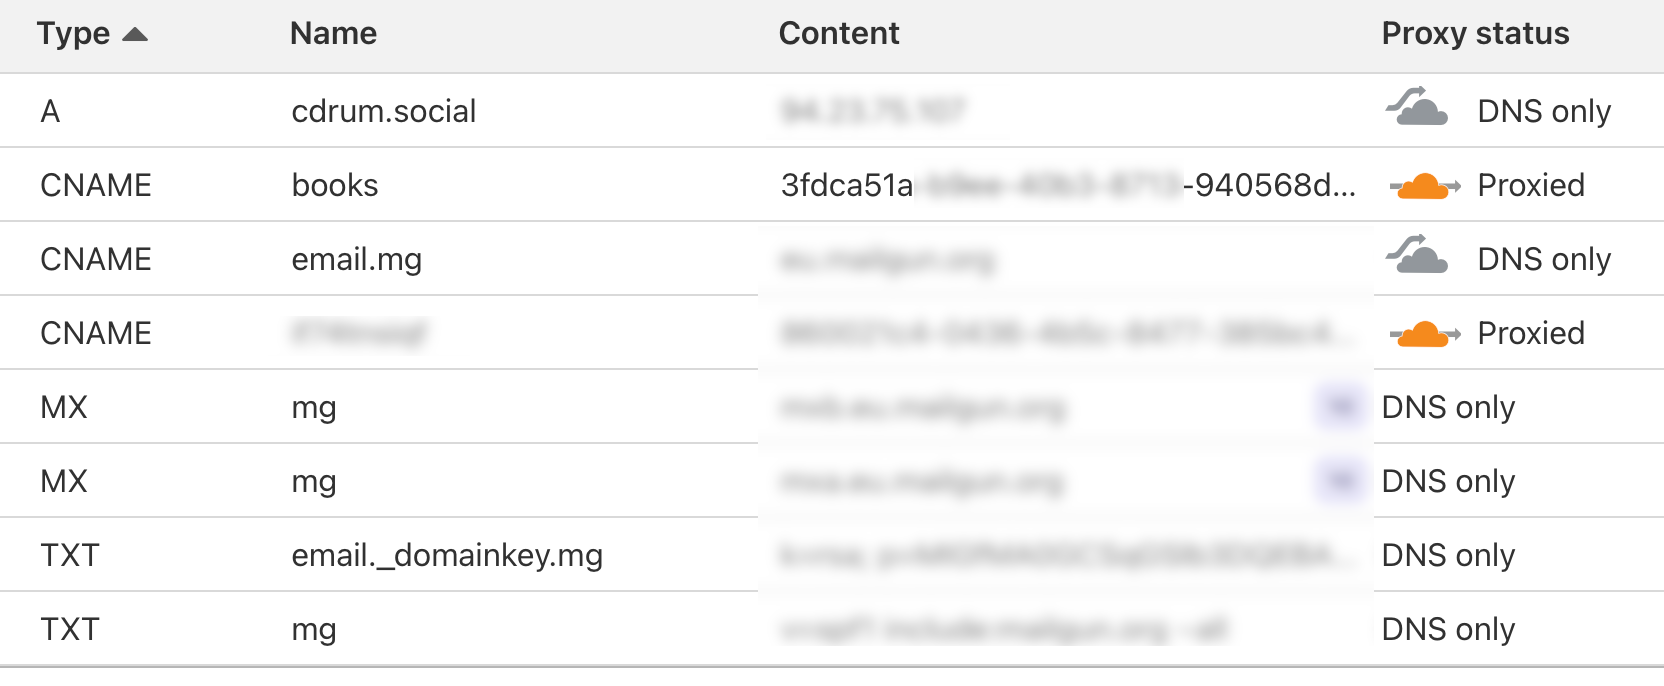
This will automatically create the hostname in the dns and it point to the proxy. Looking at the DNS entries for the domain in Cloudflare, we see something like this:
Setting up a Cloudflare Tunnel Docker Container
Now, we won’t be running the cloudflare client on the host VM - we’ll be creating a new Docker Container to do so. See this blog post for more details (I encourage you to read that post now).
Hopefully you have already cloned the bookwyrm repo and checked out the production branch. Some edits we need to make:
I made several changes to the docker-compose.yaml file. They are:
- Insert the following above the
nginxservice - this is for the Cloudfare Tunnel:
| |
We want to force this container to start before the web container.
- Remove the ports from the
nginxcontainer. We don’t need to expose ports at all!
| |
- Add the following to the
nginxcontainer definition a) Force the container to depend on thetunnelcontainer to ensure it’s loaded first, and b) force the container’s name (remember we’re referring to this in the Tunnel configuration above); I think this is needed for hostname resolution for the tunneling (? - it’s a hunch!)
| |
- Remove ALL
certbotreferences, namely the following lines:
| |
Lastly, you will see that we referenced a tunnel.env file int he tunnel docker container above. Create the file tunnel.env int he root bookwyrm folder and add:
TUNNEL_TOKEN=eyJhIjoi..........
… where the token is from this page in the tunnel config:

That’s it, really. Pretty simple. We’ll see this container fire up later when we start the real bookwyrm configuration.
SSH Access
I created a 2nd tunnel specific for SSH access. See these two blog posts for great instructions (1) and (2).
I chose to create an obfuscated hostname for the tunnel. You can also chose a different port number too if you want extra security by obfuscation.
We cna see the two tunnels in the Cloudfare Tunnel console here:

Install Bookwyrm
OK, let’s get back to setting up Bookwyrm!
Head on over to official instructions at this page and follow them. I followed majority of the instructions as is. Obviously the instructions don’t talk about tunnels or more complex situations. And, due to some of the complexity that Cloudfare handles for us, we can remove or omit some things that are no longer needed.
Do the relevant .env config file set up as per the instructions. Note that in the .env file we created, I had issues with the REDIS_BROKER password having special characters, so I removed them and kept it a simple alphanumeric password. For the email provider, I used mailgun - also free and easy to set up!
The instructions ask you to copy the
nginx/productionconfig example intonginx/default.conf. We don’t want to do that since it has all the Let’s Encrypt SSL stuff in that. We don’t need it! So, instead, copy thenginx/developmentconfig example intonginx/default.conf. And that’s it!
Then we can run ./bw-dev migrate. Grab another coffee. ☕️
Now, fire up the containers. Probably need another coffee ☕️!
docker compose up --build
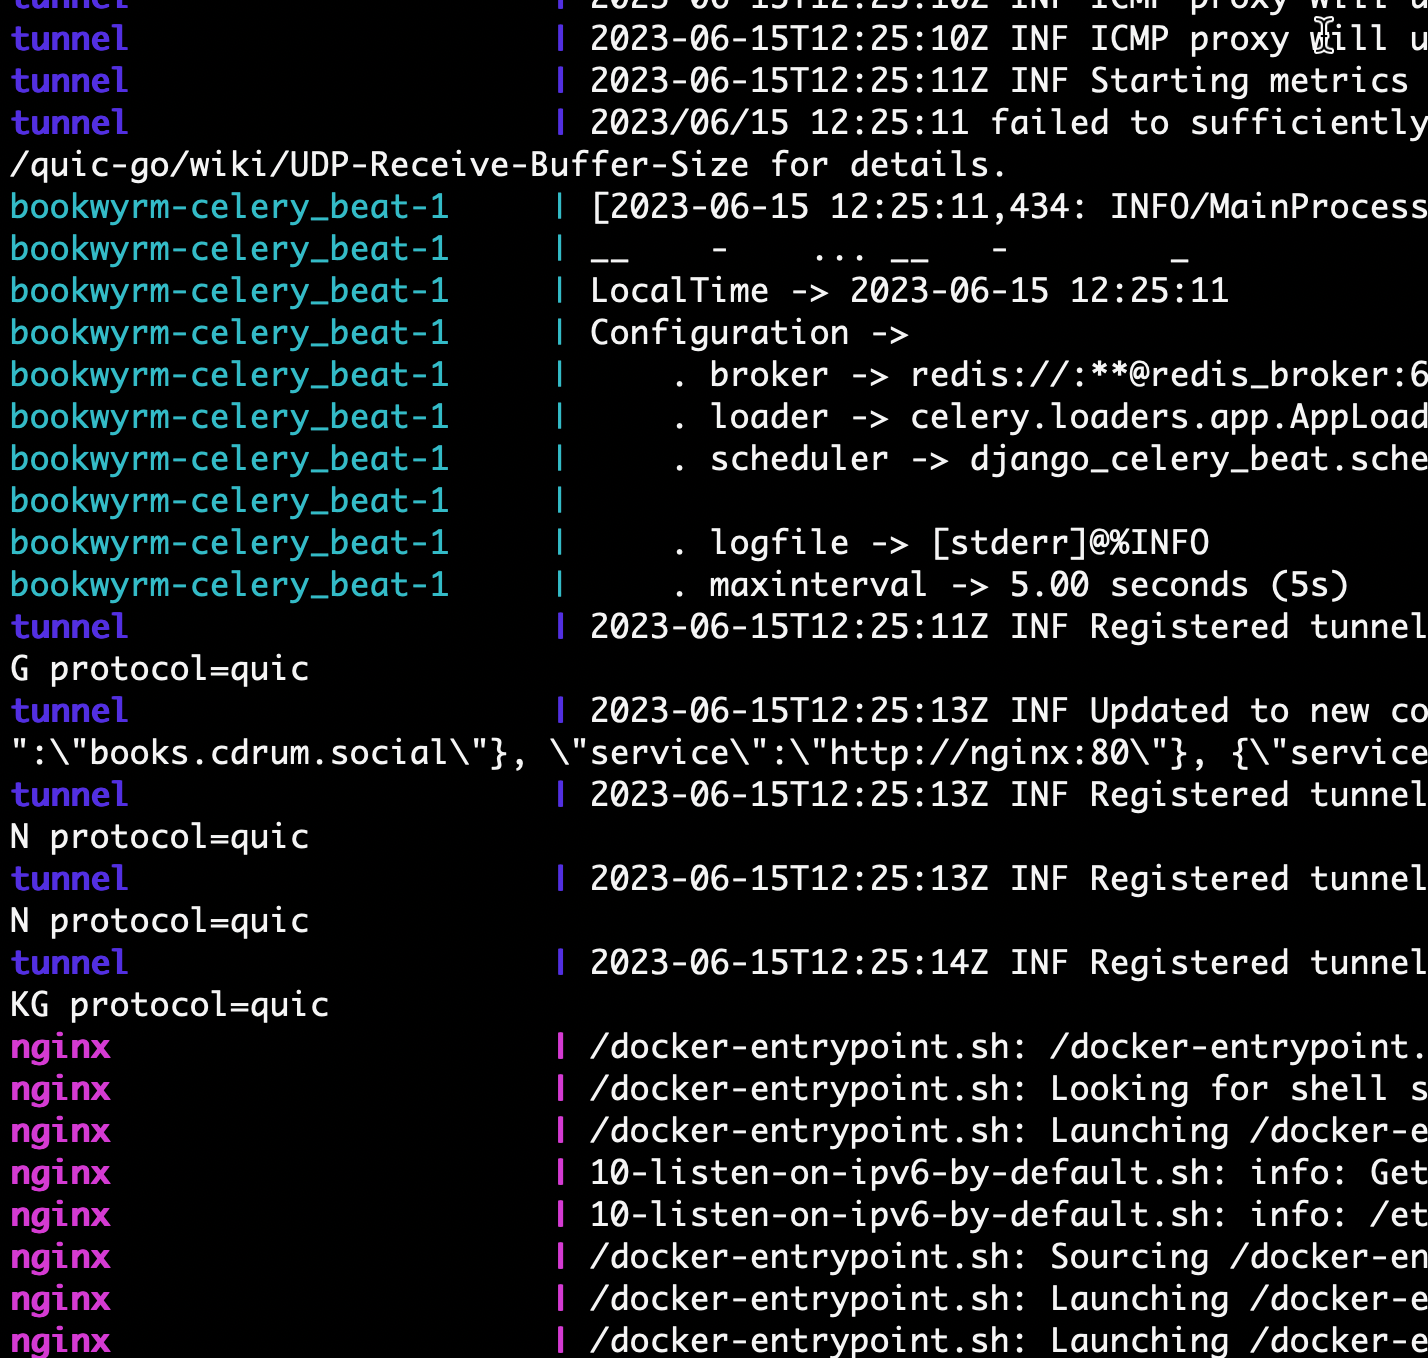
Hopefully everything succeeds and you’ll see something like the following (and a lot more of it, without any errors!)
Do a ctrl-c to exit so we can complete the rest of the tasks.
We don’t need to do any of the SSL or Let’s Encrypt-specific tasks in the instructions.
- Set up HTTPS redirect - Nope!
- Set up a cron job to keep your certificates up to date - Nope!
Finally, I didn’t bother with the external storage. They’re books, right?
Next, we run ./bw-dev setup to do the final set up stuff. Take note of the admin code, you’ll need that.
Finally we re-run docker compose but this time with the daemon flag (and without the --build flag!)
docker compose up -d
Be sure to go to the site and complete the set up!
Final Thoughts
We need to do some things like adding a service to start it up after a reboot, backups, etc. But otherwise, a pretty simple process. Let’s see how this experiment goes. I should be able to kill my Goodreads account soon!
I welcome any constructive feedback. Find me on Mastodon at @cdrum@cdrum.social.